Participants registration in RIS/PACS
Introduction
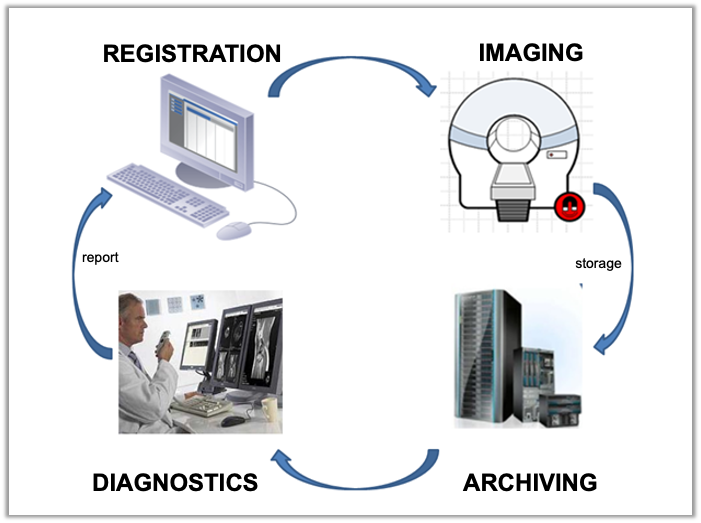
Every participant being scanned at the MRI facility must be registered in the Radiology Information System (RIS) from the hospital by means of a QP number. All images are back-upped in the Picture Archiving and Communication System (PACS) of the hospital.
This document describes how to register a participant in RIS and how to make an MRI order using IMPAX® RIS QDoc (Agfa Healthcare N.V.).
A hardcopy of this document will be available on the scanner site in a binder entitled GIfMI MANUAL. Need help? Contact the GIfMI Research Assistant.
1. Logging in to IMPAX ®QDOC
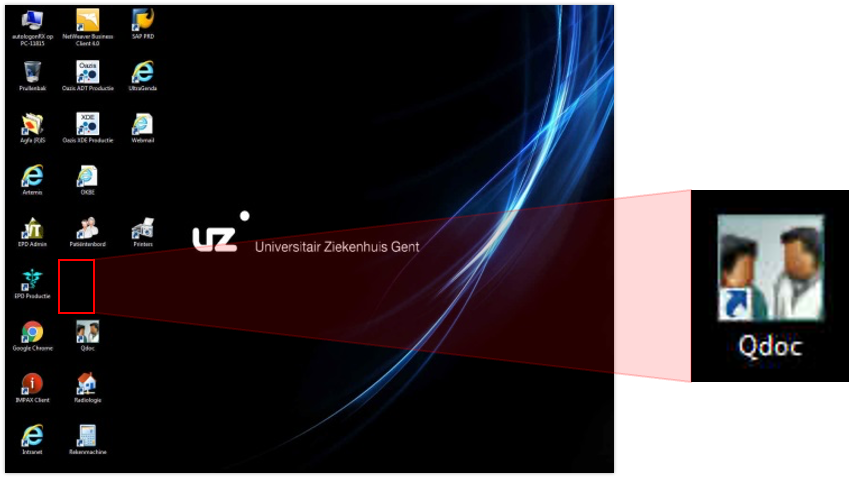
1. Start up the UZ-PC with number UZ-11815.
This PC uses “Auto log in” which means that no password or log-in are needed.
2. Double-click on the Desktop on the icon of QDoc for IMPAX®RIS registration. The software is in Dutch.
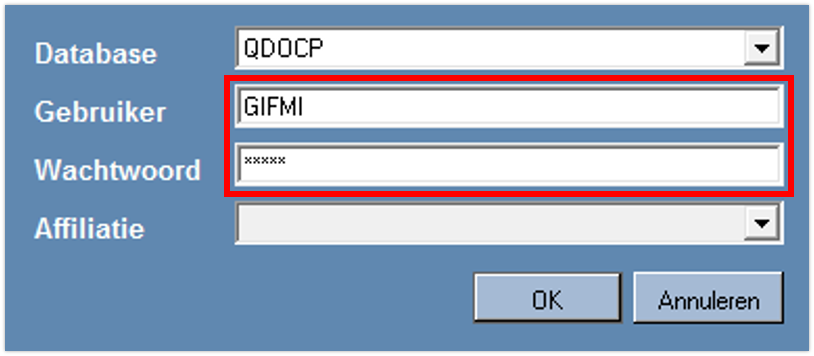
3. Login on IMPAX QDOC
| Gebruiker (User) | GIFMI (all uppercase) |
| Wachtwoord (Password) | gifmi (all lowercase) |
| Affiliatie (Affiliation) | Leave this field empty |
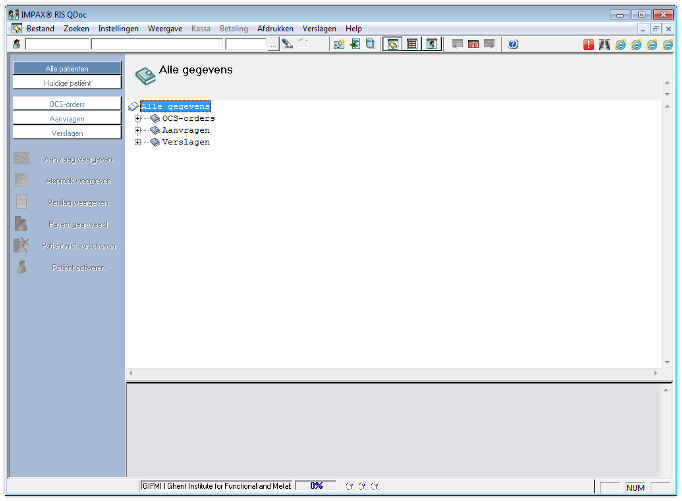
4. You are directed to the IMPAX® RIS Qdoc user interface. You are now able to generate a QP number for the participant (see partim 2).
2. GENERATING A UNIQUE IDENTIFICATION NUMBER FOR A PARTICIPANT (QP NUMBER)

You need to generate only 1 QP number per participant! Skip partim 2 if a QP number or “adrema” (in case of UZ Gent patients) number has already been assigned to participant (which is the case for a revisit within the same study). In this case, retrieve the QP number from your administration and forward to partim 3. A QP number is specific for a single participant in a single study. If a participant participates in more than one study, a new QP number has to be generated for each study.
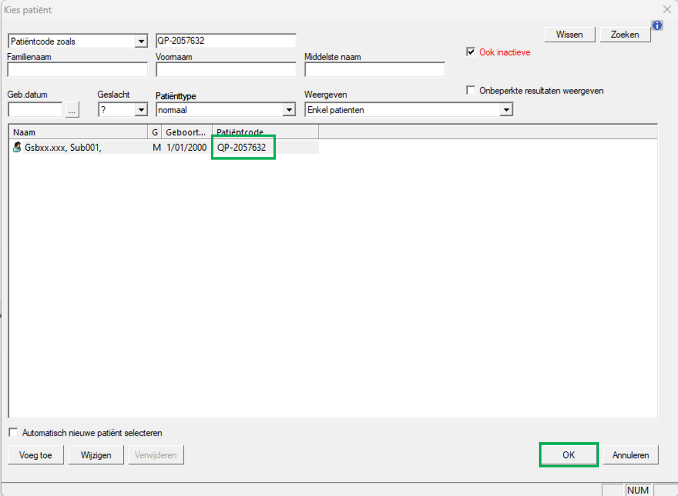
1. Click on the icon ‘. . . ’ and subsequently on ‘Voeg toe' (Add)

2. Complete these fields only and confirm with 'OK'.
Due to GDPR it is not at all allowed to fill out personal data of the participant!
| Familienaam (last name) | GSBxx.xxx f.e. GSB25.008 |
| Voornaam (first name) | PIL (pilot), SUB (subject), CTRL (control), … + number eg. SUB001 |
| Geboortedatum (date of birth) | 01/01/birth year truthfully |
| Geslacht (sex) | Select the correct sex |

3. This generates the QP number - record this in your files and use this number for every follow-up scan. Confirm with 'OK'.
3. Creating a MRI application form with the QP number
1. Red field: Fill out the QP number and press TAB.
Subject name and birth date appear in the green field.
Remark: If a QP number has already been generated in the past fort his participant but you cannot find it in your administration, enter the participant’s name (type GIFMI_STUXXX, SUBJYYY) (green field) and press the tab key. The QP number will be displayed.
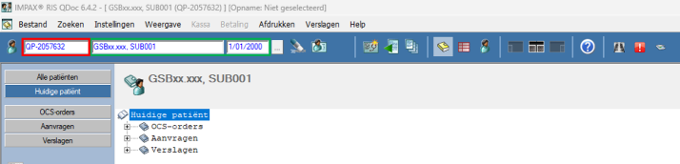
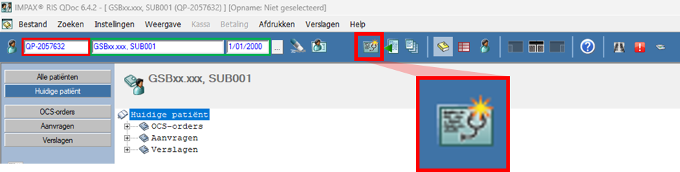
2. Click on the icon ‘nieuwe aanvraag’ (new application form).
2. Complete the form
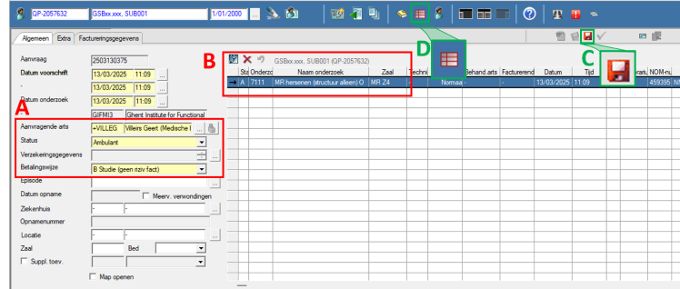
INVOICING INFORMATION (A)
| Aanvragende arts | +VILLEG ( + tab) Prof. Geert Villeirs (Head of Radiology) will be entered automatically. If the PI is the referring physician, then you fill out his/her name here. |
| Status | Studies en dergelijke |
| Betalingswijze | B Studie |
EXAMINATION (B)
Add an examination by clicking the magnifying glass icon.

| Status | 7111 (+ tab) MR hersenen structuur alleen For other scan regions, position the cursor in the field ‘Onderzoek’ and press F3 to make a choice from the decision tree. Contact the GIfMI research assistant for more information. |
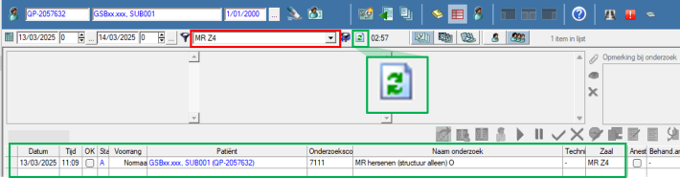
| Zaal | MR Z4 |
PRESS (C) to save the order.
Press (D) to return to the work list.
Select ‘MR Z4’ from the dropdown box
Click on the icon ‘verversen’ (refresh). Your examination is now scheduled in IMPAX® RIS QDoc and will be visible in the scheduler of the MRI scanner. All administration is finished. You can now proceed to the scanner console (partim 4).
4. Retrieving a participant on the scanner console
Given that the participant is already registered in RIS, you no longer have to enter all the data manually on the MR scanner console. You can access the registered participant on the MR scanner console as follows:
1. HOME page – Select EXAMINATION.

2. SCHEDULER – Patient Registration - Select your participant from the scheduler that lists all the participants that are preregistered in RIS (QDoc).
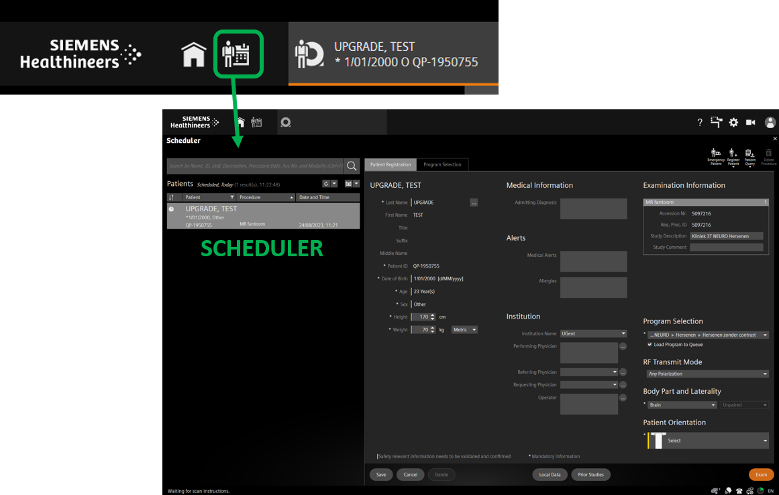
3. Fill out the mandatory fields in the Patient Registration form.
- Length and weight
- Change Institution name to what suits best.
- Program selection: roll out folder > other examination > browse through RESEARCH to select your study.
- Transmit mode: ‘any polarisation’
- Body Part & Laterality: Brain
- Patient Orientation: Head First Supine
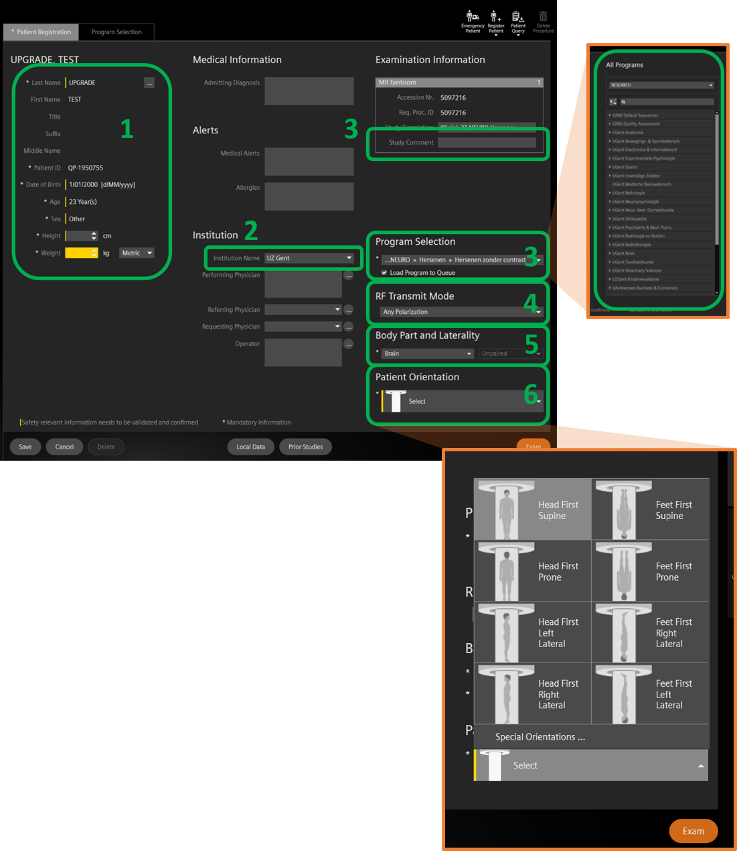
4. Click EXAM to move to the EXAMINATION CARD and to start scanning.

5. Closing the examination administratively
1. Select your MRI examination in the list.
2. Change the Status field from ‘S’ (Started) to ‘F’ (Finished) by checking the box of the ‘OK’ field.

3. Close IMPAX® RIS Qdoc
4. Shutdown the PC.